Patient Subjective Complaints are entered in the Subjective window of ChiroPadEMR. In order for them to be listed on the Subjective window, and in order to generate the correct verbiage, it is necessary that each Complaint is entered in the Complaints Customization area. ChiroPadEMR empowers the user to add, edit, and/or delete Complaints from the system.
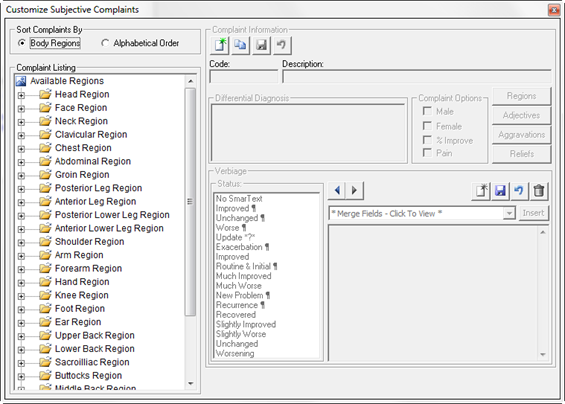
Click on Complaints (figure 1) to open the Customize Subjective Complaints window (figure 4).
Figure 4
Note that the Regions for Complaints are listed in the column at the left. There are 2 sort options for this list, and they determine how the Complaints will appear on the Subjective window of ChiropadEMR. Most offices find that it is most efficient to have the Complaints displayed by Region so there should be a black dot next to Body Regions.
However, when it is time to create, edit or modify any of the Complaints, place the dot next to Alphabetical Order (figure 5). This makes it easier to find each Complaint and eliminates the need to search through each body region to find every item that is desired.
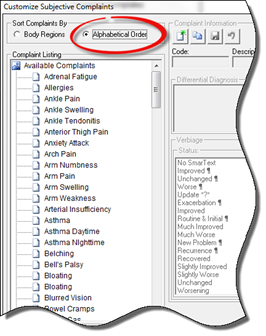
Figure 5
Once the list of Complaints is in Alphabetical Order, every Complaint in the system is on the list. Scroll through the list to find the Complaint that needs to be edited. If the Complaint needed is not on the list, then a new Complaint can be created.
In order to create a new Complaint, click on either the New icon or the Clone icon (figure 6).
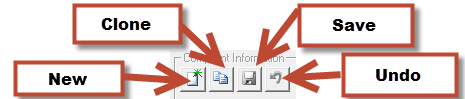
Figure 6
If the new Complaint that should be created is similar to one that already exists, click the Clone icon. This opens a copy of the existing Complaint allowing the Complaint Code (ID) to be changed. After the Complaint Code has been changed, edit only the items that require alteration to form the new Complaint.
There may be the need to create a new Complaint when there is
nothing similar in ChiroPadEMR. Click on the New icon  which opens a blank Complaint window (figure 7) to
enter all the necessary items for the Complaint.
which opens a blank Complaint window (figure 7) to
enter all the necessary items for the Complaint.
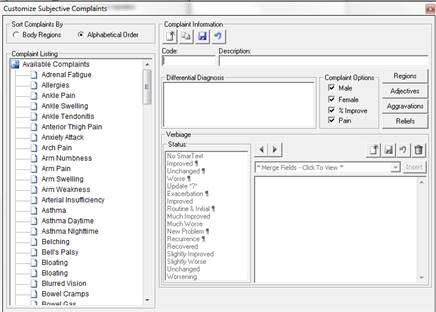
Figure 7
Starting at the top center create and enter the Code, which is the system’s ID for this Complaint item. Once this Code has been created, it cannot be changed for this Complaint.
To the right of the Code box, type in the Description (name) of this Complaint. The entry made in this box is the name that will appear on the Available Complaint list.
Under the Code box is the Differential Diagnosis box. The information placed in this box will appear on the DDX Tab in the patient’s Subjective Complaint window. This is reminder for those of us that do not have perfect photographic memories. Enter in this box all the other serious problems or health issues that this Complaint could be indicating. Whenever this Complaint is selected for a patient, view the DDX Tab and then investigate to determine if any of those other problems or issues are present because they may change how the patient should be treated.
The next item, on the right side of the Differential Diagnosis box, is Complaint Options.
•If this Complaint applies to boys and men, place a check in the box for Male.
•If this Complaint applies to girls and women, place a check in the box labeled Female.
•Obviously, if the complaint applies to both, there should be a check in both boxes.
•%Improved is for any Complaint in which a percentage of improvement can be noted. This applies to almost every Complaint and therefore there should almost always be a check in this box.
•If this Complaint can include Pain, then place a check in this box. If the Complaint can NOT have pain, such as Dizziness, then leave the checkbox blank.
Further to the right are 4 buttons (figure 8); Regions, Adjectives, Aggravations and Reliefs. Clicking on each of these buttons opens a corresponding window enabling the application of specific items to the Complaint. After a new item has been added to the Available list in a specific section, that item will be on the Available list for all Complaints. For example, once a new Aggravation is added, it will be on the Available list for Aggravation for all other Complaints.
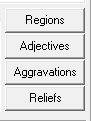
Figure 8