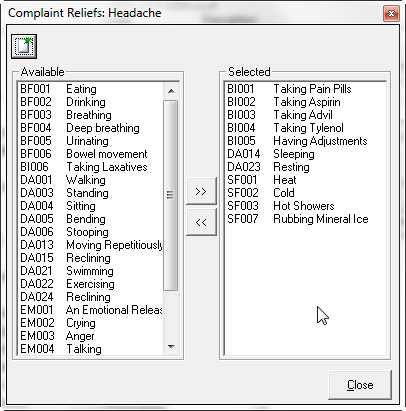
The Reliefs button opens the Complaint Reliefs window (figure 14) with a list of all the things that improve, relieve or make better the selected Complaint. As with the Regions, Adjectives and Aggravations, the choices made here apply ONLY to the Complaint being edited. The list of selected Reliefs appears in the right Better Column on the Worse/Better tab in the patient’s Subjective Complaint window.
Figure 14
In the Reliefs window there are 2 columns, Available and Selected. The Available column shows all the items that may be applied, but have not been selected. The items listed in the Available column will NOT be displayed in the patient’s Subjective Complaint Worse/Better tab window. The Selected column lists all the items that will be available in the patient’s Subjective Complaint Worse/Better tab window when this Complaint is chosen. In between the 2 columns are a Right Arrow and a Left Arrow.
To move an Available item to the Selected column, click on the item in the Available column so it is highlighted. Next, click on the Right Arrow and the Available item moves to the Selected column.
If there is a need to remove an item from the Selected column, click on it in the Selected column so it is highlighted and then click the Left Arrow to place the item in the Available column. Once an item is moved to the Available column, it will no longer be displayed in the patient’s Subjective Complaint Worse/Better tab window for this Complaint.
Should there be a need to add another item to the Available list, click on the
New icon.  This opens the Add New Reliefs window (figure
15).
This opens the Add New Reliefs window (figure
15).

Figure 15
•Verify that the Type is set to Body Function and has been correctly selected.
•The ID for the New Reliefs has 2 parts, the first is automatically entered by the ChiroPadEMR based on the Type selected from the drop down box. The second part of the ID is a number that must be assigned to this New Relief, and ChiroPadEMR will display what this number must be greater than. By displaying the number that the new entry must be greater than, it prevents the attempt to enter a duplicate number.
•In the Desc box, enter the name/description of this New Relief.
•Finally, click OK and the Relief is added to the list of the Available items
•Once it is on the Available list, it can be moved to the Selected list when it is appropriate