 Range of Motion Range of Motion
The patient’s Range of Motion is recorded by
clicking the button. The ROM
normals used in this part of the program are based on the text Guides To
The Evaluation of Permanent Impairment published by the American Medical
Association.
The first time that this section is opened, click the New icon (figure 18) in the upper left corner to open the ROM area.

Figure 18
Automatically, today’s current date will be entered as the date of this ROM exam in the Date Field drop down box. The ROM exam will be entered in today’s current SOAP note only when the exam has today’s current date. If the ROM exam was performed on another date, yesterday for example, and the date in this box is changed, then the ROM exam will NOT appear in today’s current SOAP note. In order to change the date of the ROM exam, click on the Pencil icon to the right of the Date Field. This separates the date and time items allowing either or both to be edited. After the date or time has been changed, click the Pencil icon again to lock in the change.
To the right of the Date Field, there is a ROM Selector drop down box (figure 19). Click on its drop down arrow to see the list of ROM exams that are available. Choose the appropriate ROM exam by clicking its name.
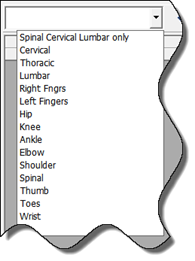
Figure 19
If this is a follow-up visit and the ROM had previously been entered, a list of all previous ROM exams is displayed in the box under the Date Field. Click on the date of the desired previous ROM exam, usually the most current one. In the ROM Selector box there will be a blue dot next to the ROM exam (figure 20) that was previously performed on the chosen date.
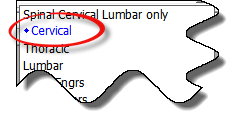
Figure 20
Whether this is the initial ROM exam or a follow up, choose the desired ROM exam from the ROM Selector. If this is an initial ROM exam, the ROM Findings window will open with NO entries having been made. If this is a follow up ROM exam, and the selection of a ROM exam was one of those with a blue dot, then the display will show the ROM Findings from that prior date (figure 21). This will save some data entry time since the only items that will require an entry are those that are different from the prior visit.
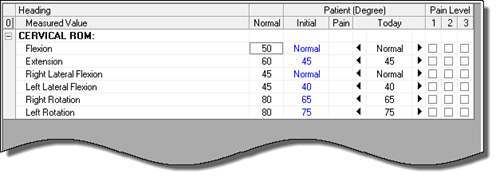
Figure 21
The Pain Levels are 1 Mild, 2 Moderate and 3 Severe. Place a check in the box that corresponds to the amount of pain that accompanied that specific ROM. Click the check box a second time to remove the check from the Pain Level.
Once all the entries have been completed, click the Save icon (figure 22) in the upper left corner of the window.
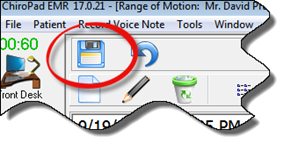
Figure 22