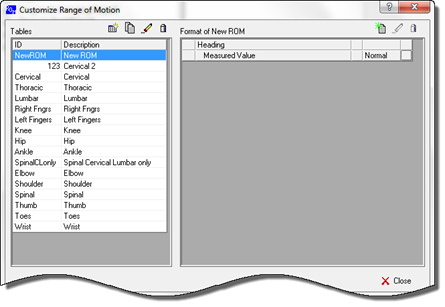
If the Table is completely new, clicking OK opens the Customize Range of Motion window, displaying a blank Format box (figure 12). If the Table has been Cloned, clicking OK opens the Customize Range of Motion window with data already filled in (figure 8).

Figure 12
Once a Table has been created or Cloned, it is necessary to enter or edit the Titles and/or specific ROM Measurement items in the Format column.
Above the Format column is a series of 3 icons (figure 13), New, Edit and Delete.

Figure 13
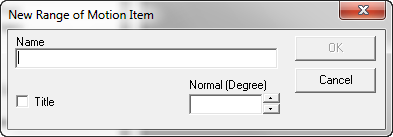
Click the New icon to create either a new Heading or a new Measurement item. This opens the New Range of Motion Item pop up (figure 14).

Figure 14
BEFORE entering the Name of this item, decide if it is a Title, that is, a heading for a group of measurement items, OR if it is an item for measurement that has a Normal Value. To make the entry
•Type in the Name of this item
•Either place a check in the Title checkbox OR enter the Normal Value for this Range of Motion
•Click OK to add this item to the list.
If the line items already exist, whether from Cloning or from previously having been entered, click on the item in the Format box to highlight it, and then click the Edit icon. This enable the ability to change the Name of the item, change its categorization to/from Title to Measurement Item, and to change its Normal Value. Make the entries and then click OK. The changes take affect immediately.
Should there be a Heading or Measurement Item that is never used, it may be deleted. Click on the item to highlight it, click the Delete icon, and ChiroPadEMR will confirm that the deletion is the correct action